
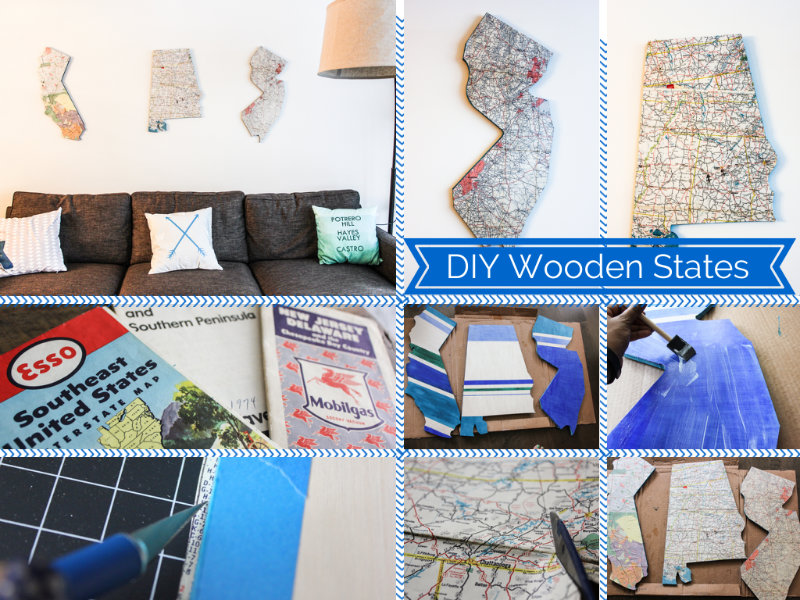
I am currently nesting in my home. My husband and I moved in a year ago and we still had empty walls. I finally took some time to sit down and put together a cute wall art project. I bought these sweet wooden states online. New Jersey for me, Alabama for the hubby and Cali for us. I initially painted these wooden state cut outs with different colored stripes and it looked terrible. FAIL! Then I picked up some cheap vintage road maps from an antique shop and used them to cover up the ugly. I loved the end product- it spruced up the walls and I feel like I’m slowly starting to make San Francisco home.
Supplies
wooden state cut outs
vintage maps big enough to trace your state on
scalpel
Mod Podge
scissors
foam brush
pencil
1. Trace the state onto the map with a pencil and cut it out with a scissor.
2. Use the foam brush to apply a thin layer of Mod Podge to the wooden state and lay your cut out map on top.
3. Use the scalpel to cut up any rough edges so that the map is flush with the edge of the wood.
4. Add a layer of Mod Podge on top and let it dry! Now the map might bubble up a little bit, but don’t worry- after it dries everything flattens out.
My California is a bit off kilter on the wall , but I plan on getting 3M strips to fix that up. I also painted the edges of the states a nice blue color to make them pop.


One Response
Very unique decor idea. Love it!
Comments are closed.